
What’s new in Butlr: a rebuilt dashboard and smarter access control
Category
Category
A look at our latest updates and what they mean for the way your team works in Butlr.
The refreshed Butlr dashboard, now faster and clearer across every floor.
We rebuilt how you see your occupancy data across Butlr. The short version: clearer numbers you can trust, presented in a faster, easier interface. Here is what is new.
See your live floors at a glance
The Live page is now your single destination for real-time and same-day monitoring, so there is no more switching between views. A new Busy Level indicator (Quiet, Moderate, Busy, Very Busy) gives you the picture in one glance, with time windows from 5 minutes to 4 hours for entry and exit counts. Every floor now opens with a Floor Setup Card showing your sensor mix, sensor health, and exactly what data that setup can produce, so when two floors look different, you will know why. Room data also now matches room type, so each number says what it actually measures.
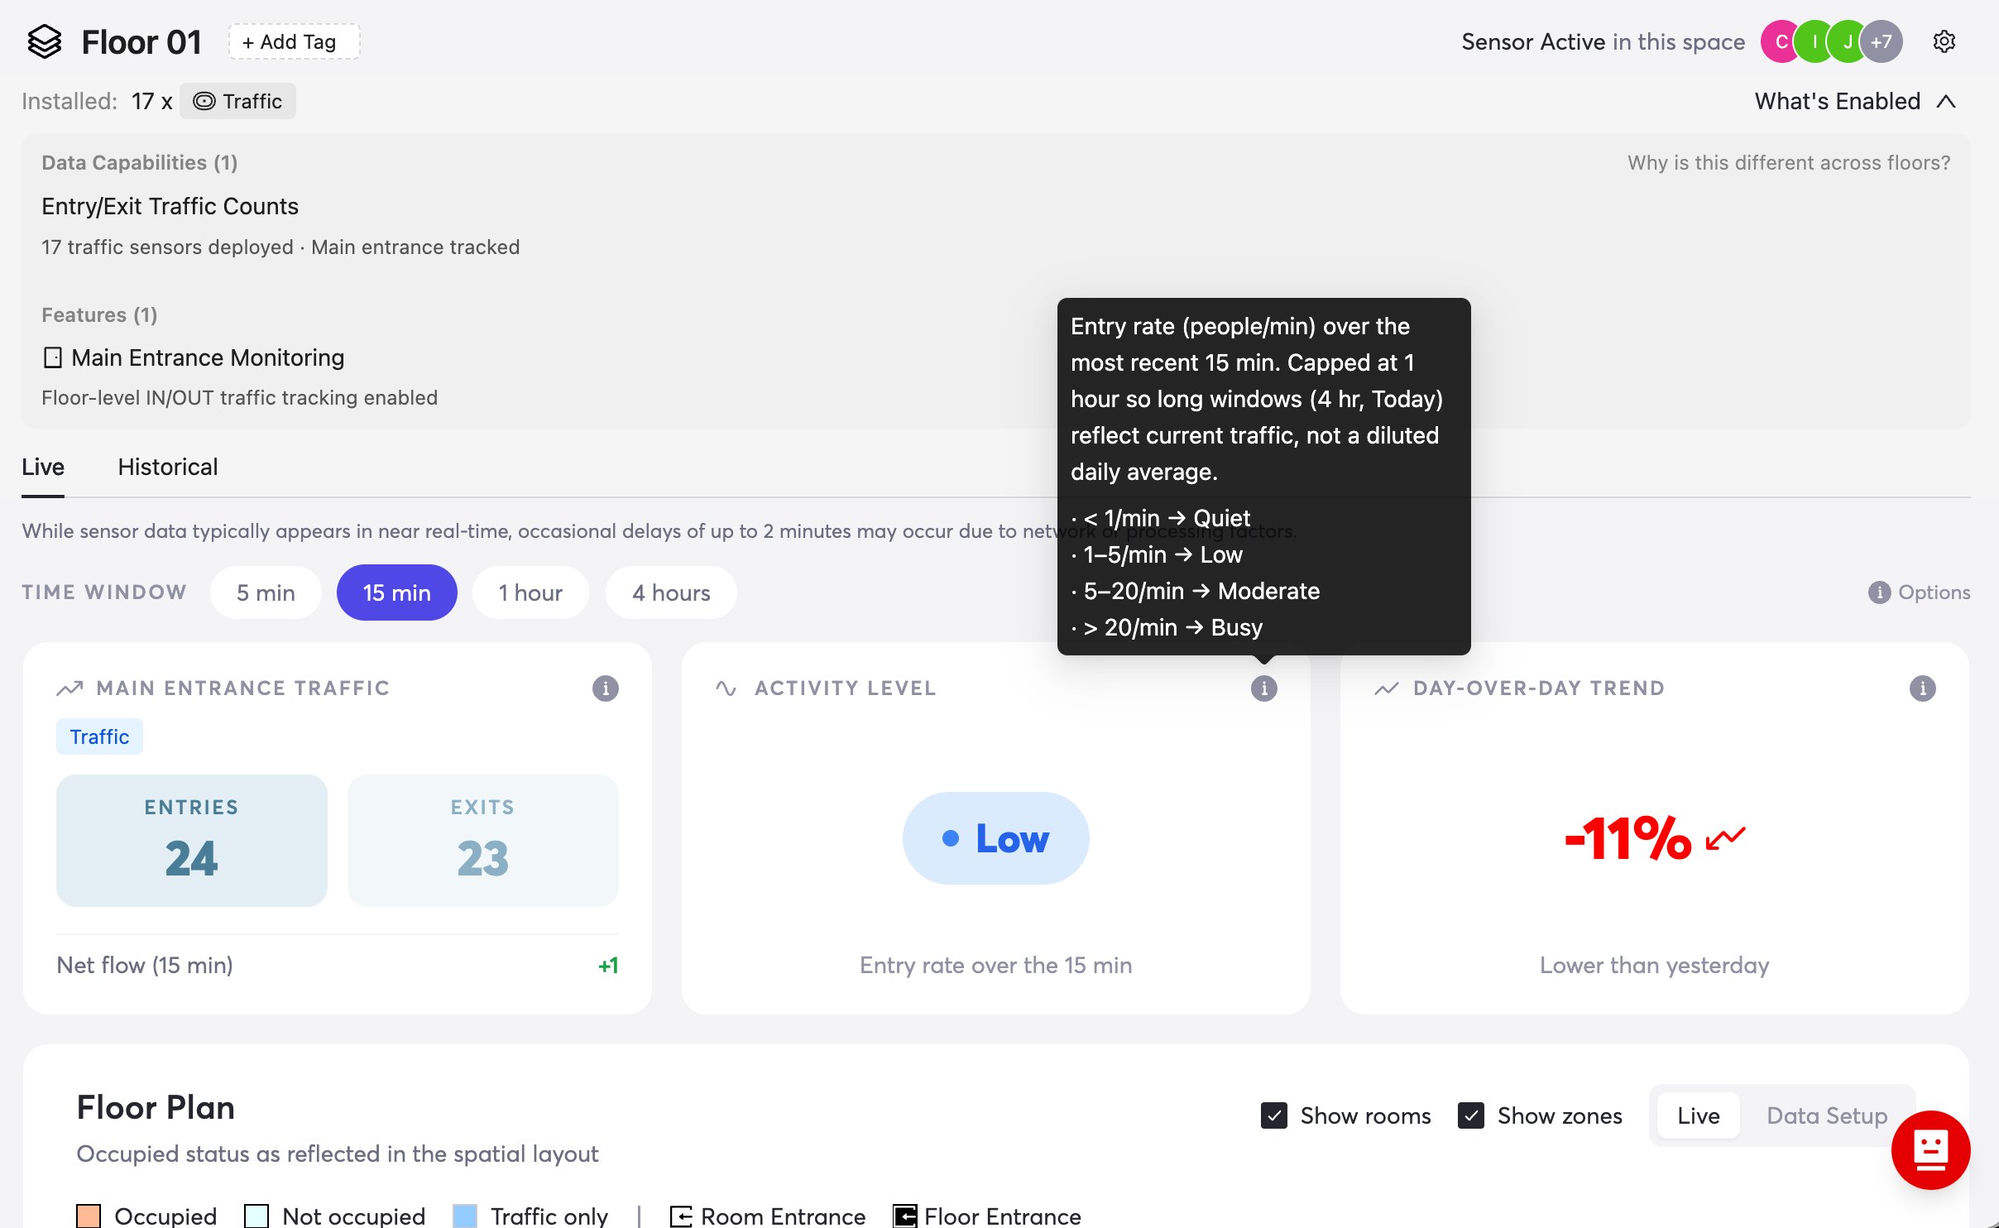
The Live page brings real-time and same-day monitoring into one view.
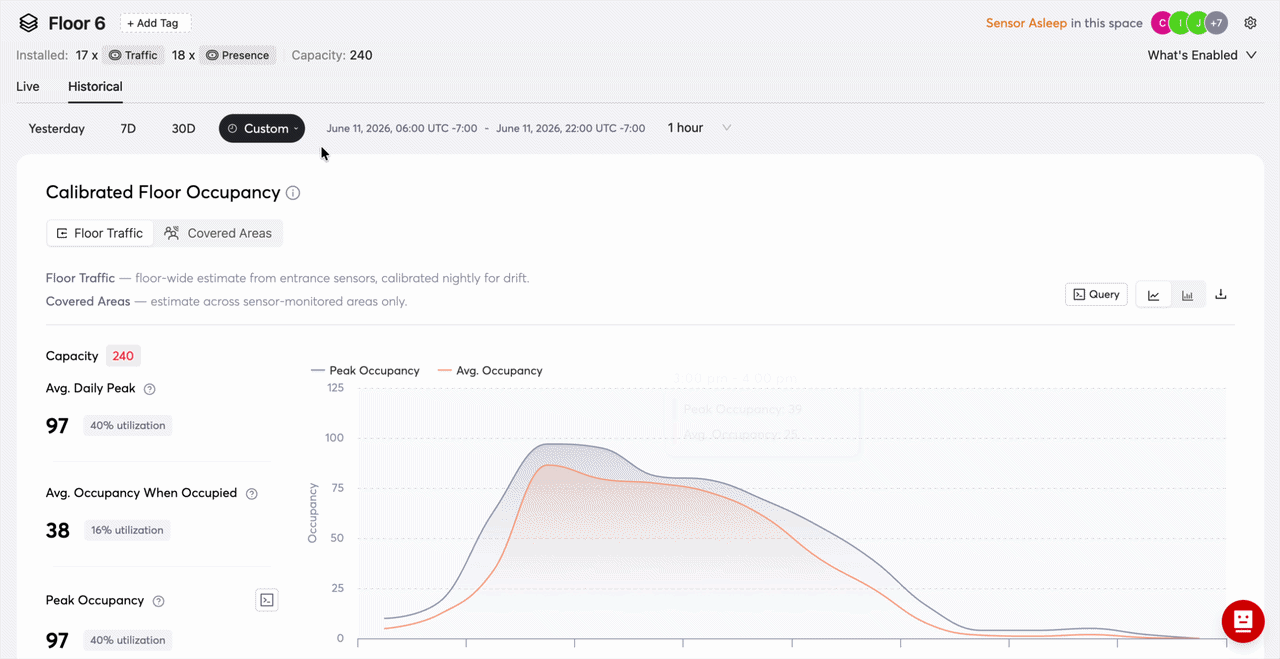
A more honest, more useful Historical view
We added Avg. Daily Peak, a metric that came straight from your conversations with us. If your daily average is 25 but your peak averages 50, you need to plan space for 50. We also added a Total view that combines all your entrance sensors into one Entries and Exits chart, with your busiest entry and exit hours highlighted. On floors with both entrance and presence sensors, occupancy now reconciles the two into a single Calibrated Floor Occupancy you can rely on.
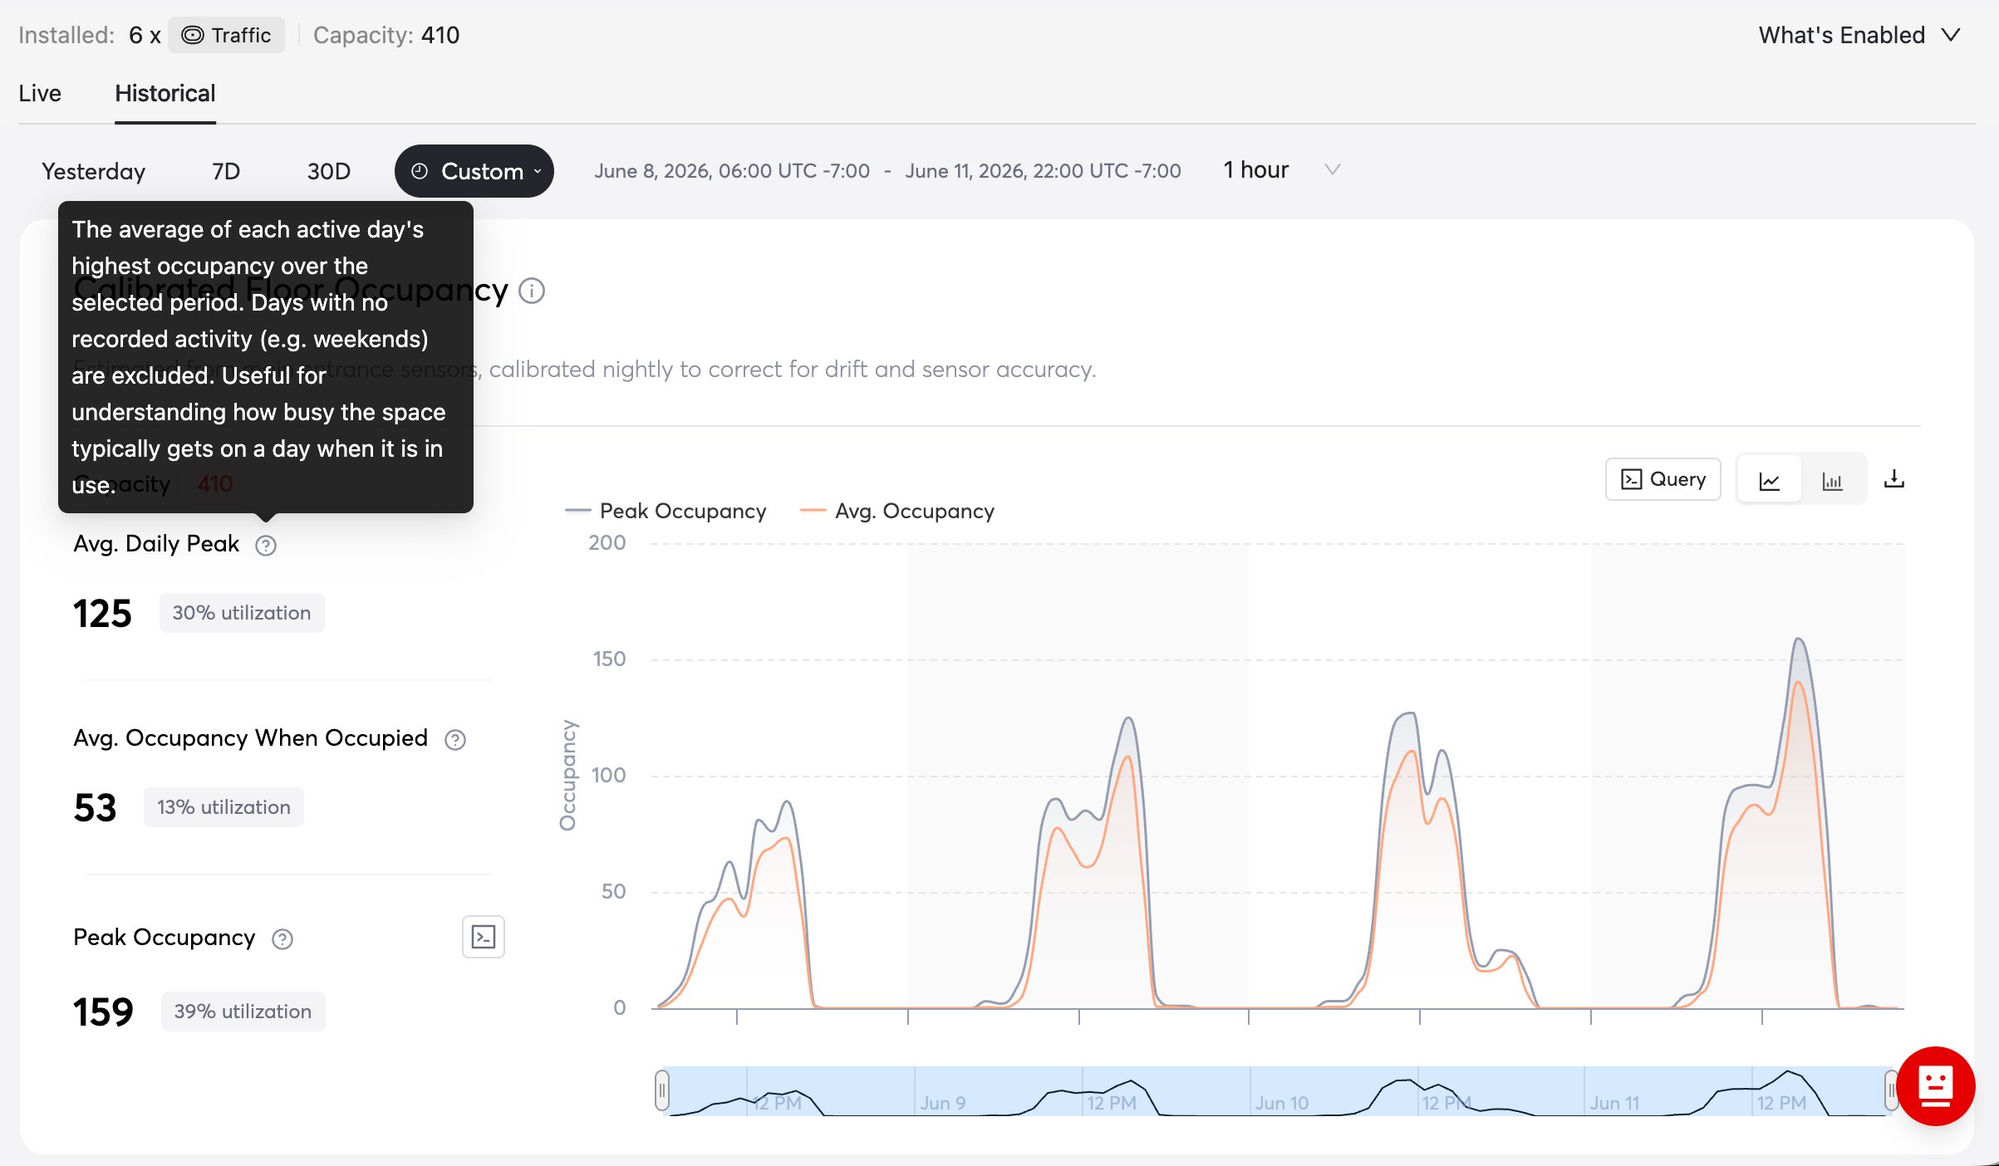
Avg. Daily Peak and Calibrated Floor Occupancy give you numbers you can plan around.
Your whole building, floor by floor
The building Live tab is now a full status view: per-floor cards with traffic counts, presence trends, sensor health, and a data-source label on every number. A new Coverage Summary shows floor coverage, sensor health, and data coverage across the entire building at once.
Suggested caption: See coverage, sensor health, and trends across the whole building at once.
Also new this month
If you are an Owner
If you are an Admin
If you are a Member
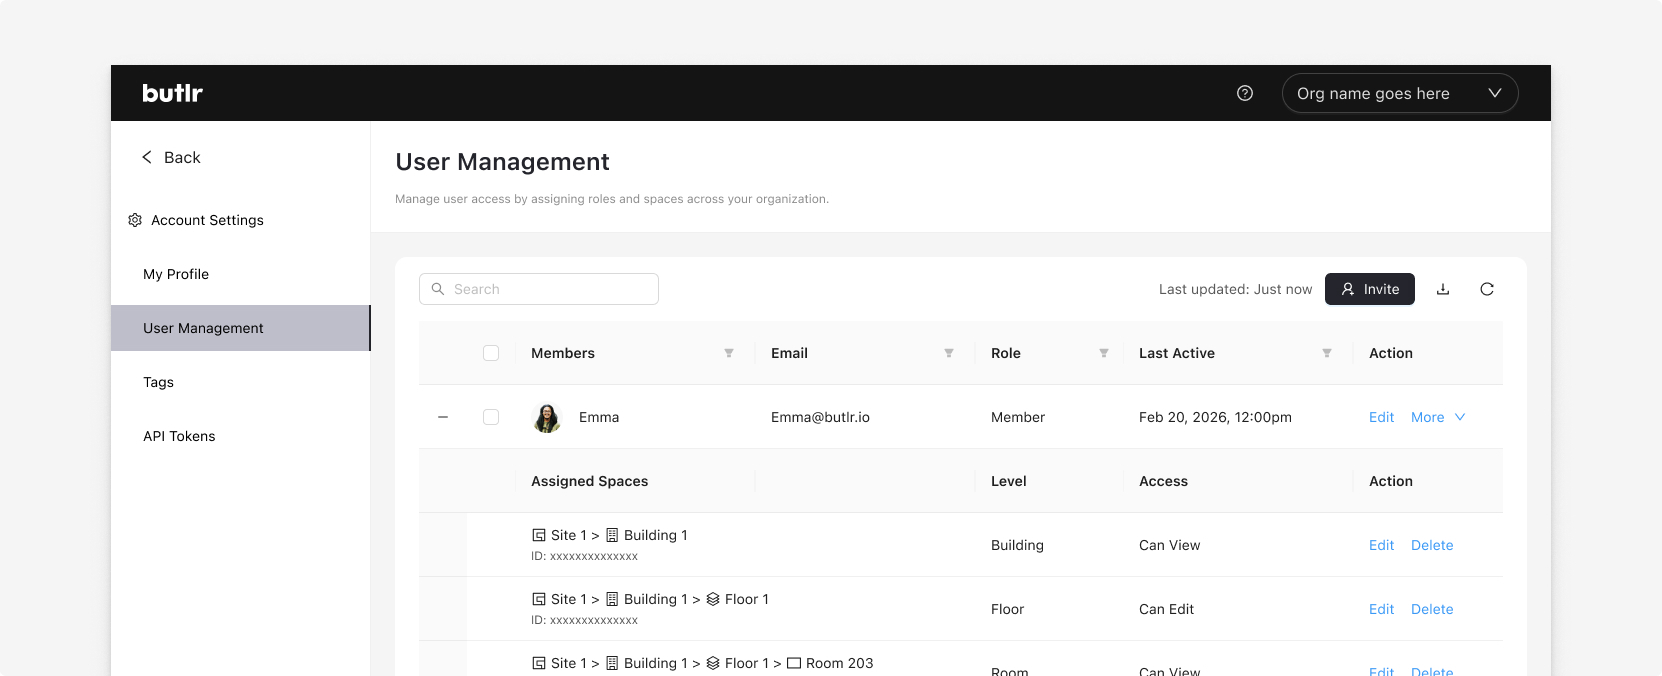
Assign roles and set space permissions from Account Settings.
Getting started is simple. Go to Account Settings > User Management to invite your team and set permissions. For the full breakdown, see how roles and space permissions work.
Both updates are live in your account today. Log in to explore the rebuilt dashboard and set up your team in User Management.
Want the full detail? See the complete Web App release notes.

West Coast, US
800 Airport Blvd
Burlingame, CA 94010
East Coast, US
501 Mass Ave
Cambridge, MA 02139
Japan
CIC, 1 Chome-17-1 Toranomon,
Minato City, Tokyo 105-6415


.svg)
.svg)

.png)

.png)
.png)
.webp)